Stories
Always up to date. Always informed
HORSE PROTECT Liquid Rubber in the horse transporter – safe and comfortable in five steps
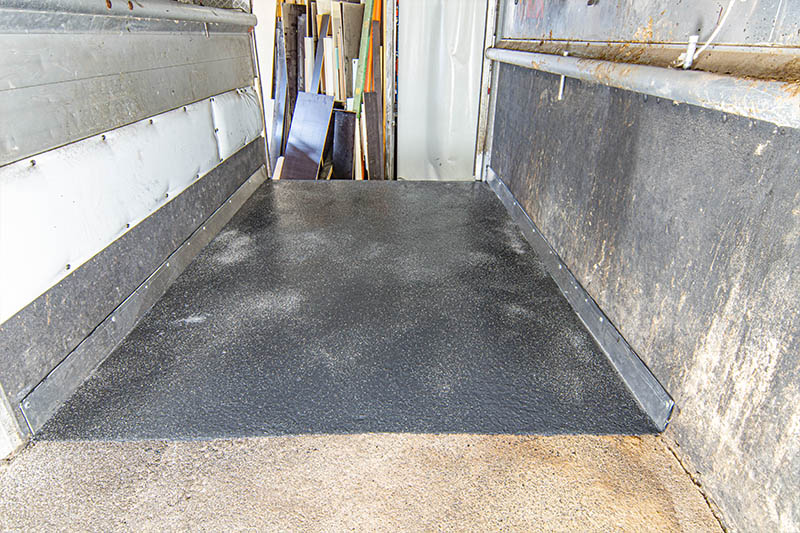
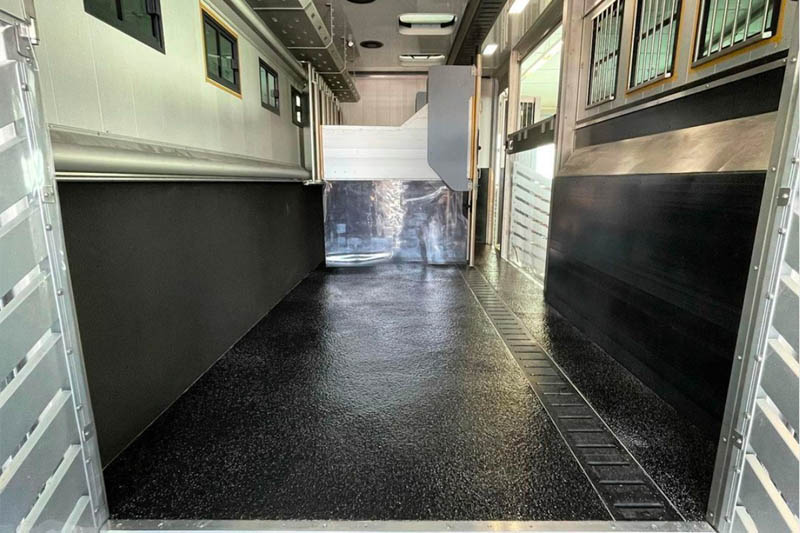
From old to hygienic and safe. Just like in stalls and stable aisles, the floors in animal transporters and horse trailers are also exposed to continuous stress and strain. This becomes clearly apparent over time. Our liquid rubber offers an opportunity to renew the floor while increasing comfort and hygiene for the horses. The non-slip, elastic special flooring made of liquid natural latex offers the animals stability. The animals' hooves sink ever so slightly into the surface. The impressions that they leave behind are a quality characteristic of high stability and elasticity. The covering, which is also commonly called rubber screed, does not suffer any damage as a result of this.
Liquid rubber flooring is also watertight and easy to clean with a high-pressure cleaner. This flooring therefore protects the substructure of transporters or trailers far better against rot than the rubber mats that are often used, which are seldom able to prevent the ingress of liquids and urine. Bacteria and odours don't stand a chance. And last but not least, the slightly shiny liquid rubber flooring simply looks good and therefore also lends the floors of older transporters and horse trailers a new lustre.
The safe, non-slip and elastic special flooring consisting of natural rubber is installed on site in five steps and is fully load-bearing after a curing time of two days.
Step 1: Thorough cleaning of the trailer surface
As is the case whenever our rubber screed is used in stalls, stable aisles or washing stations, the more thorough the cleaning, the longer the flooring will last. A wooden floor in a cattle transporter or a horse trailer is equally suitable as a substrate as concrete, interlocking paving or metal.
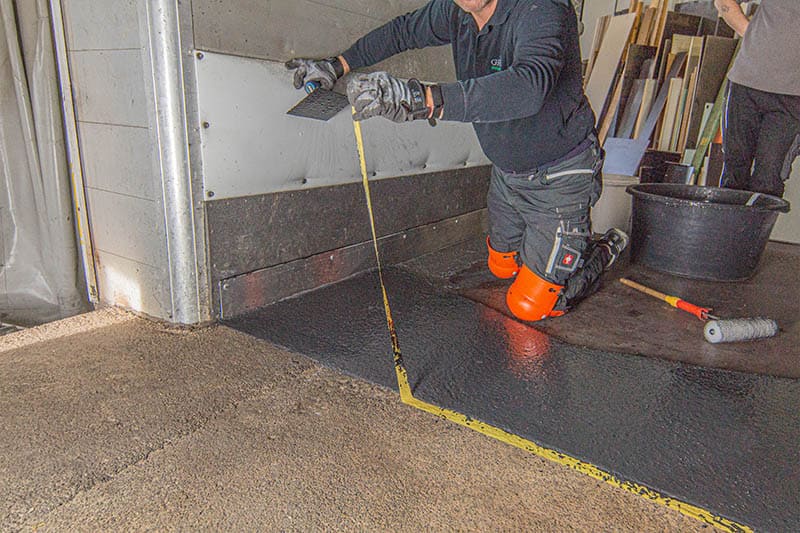
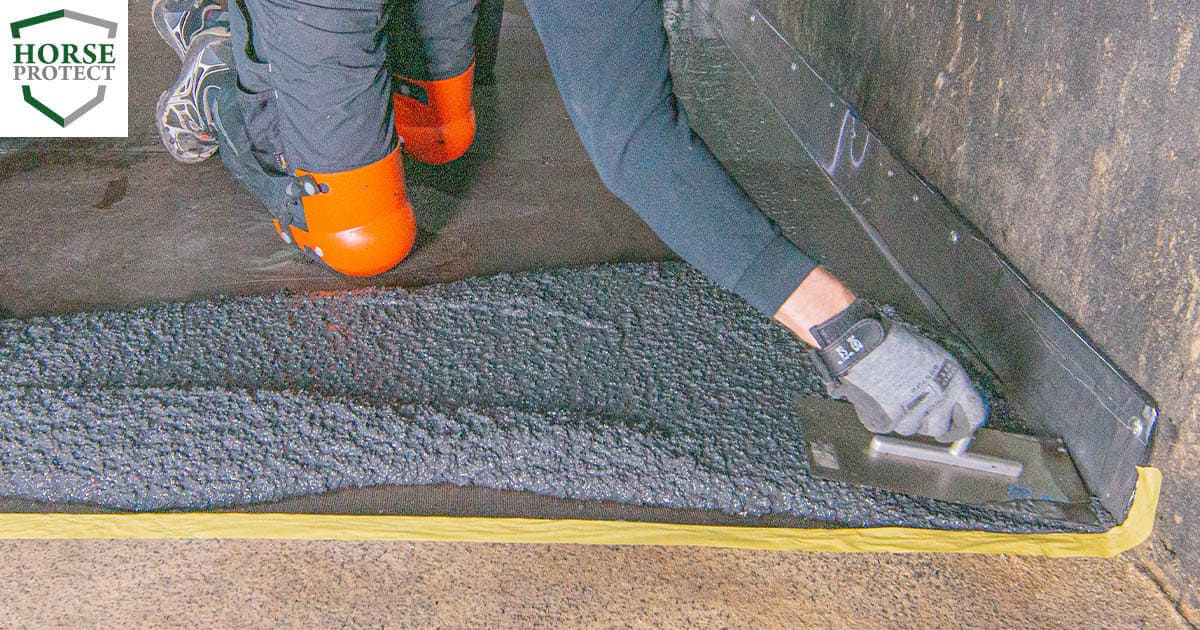
Step 2: Masking of the walls and transitions to doors and the tailgate
Painstaking work is also required during the second step of preparation. Transitions to the tailgate and doors should be carefully masked. Precise edges not only look good, but make it easier to subsequently clean the liquid rubber coating.
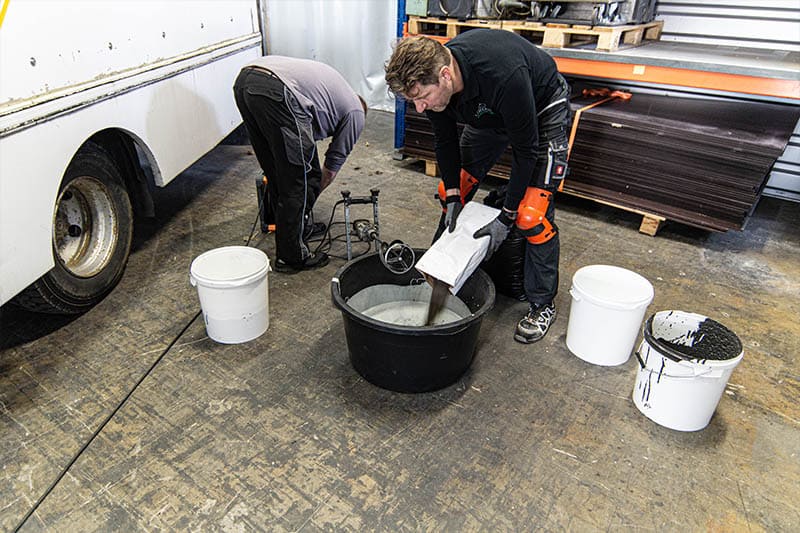
Step 3: Mixing the HORSE PROTECT Liquid Rubber
Now the 3-component liquid rubber flooring needs to be mixed. The components – a liquid natural latex, a hardener powder and the special granulate – are simply mixed together in a drum. This is as uncomplicated as it is safe. The result is a dark brown or black pulpy compound.
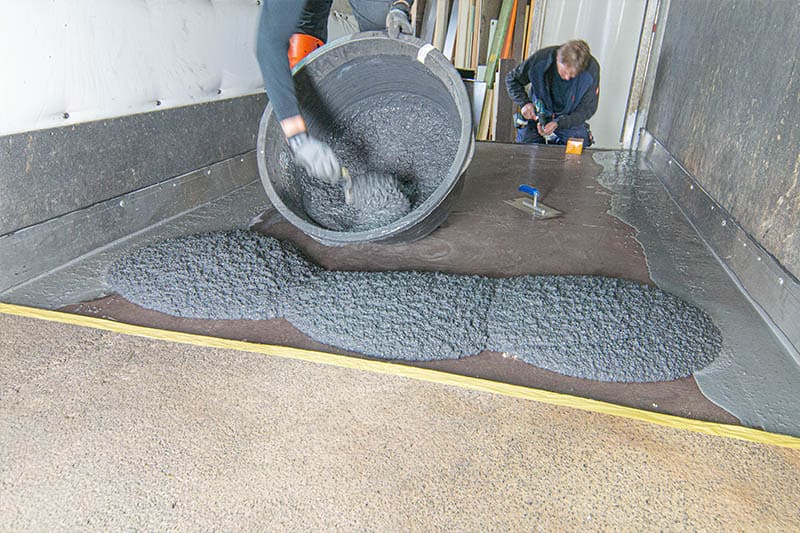
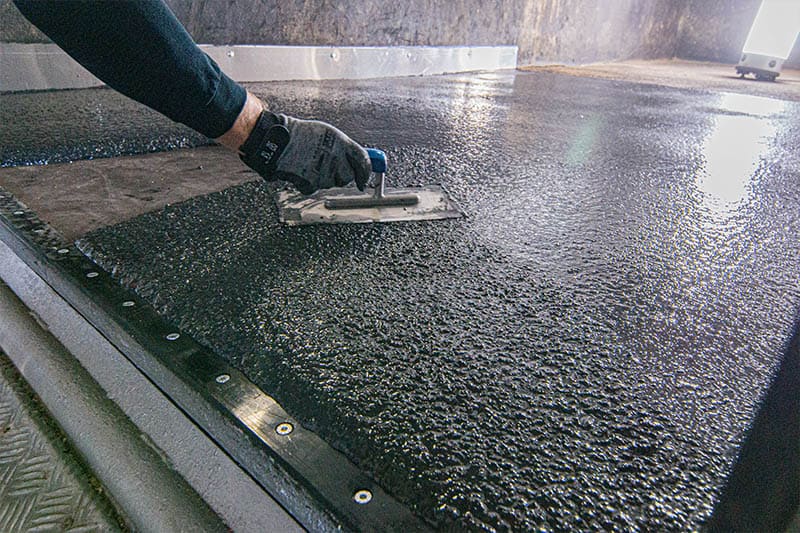
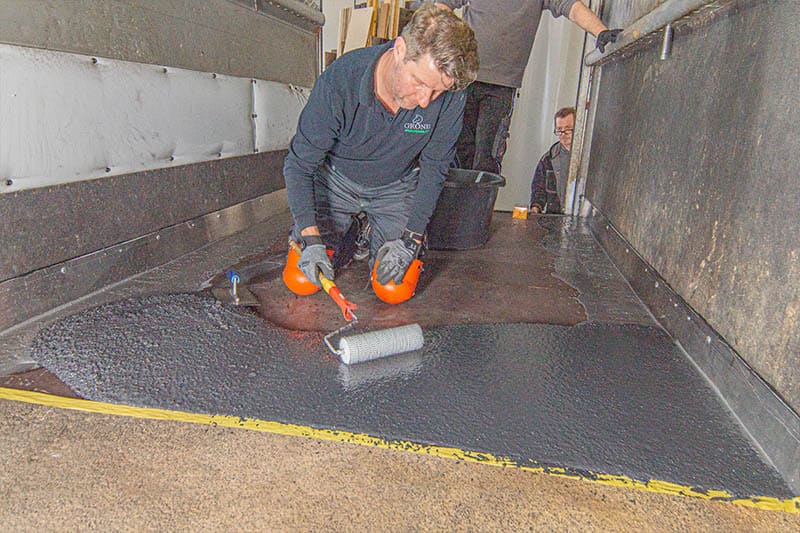
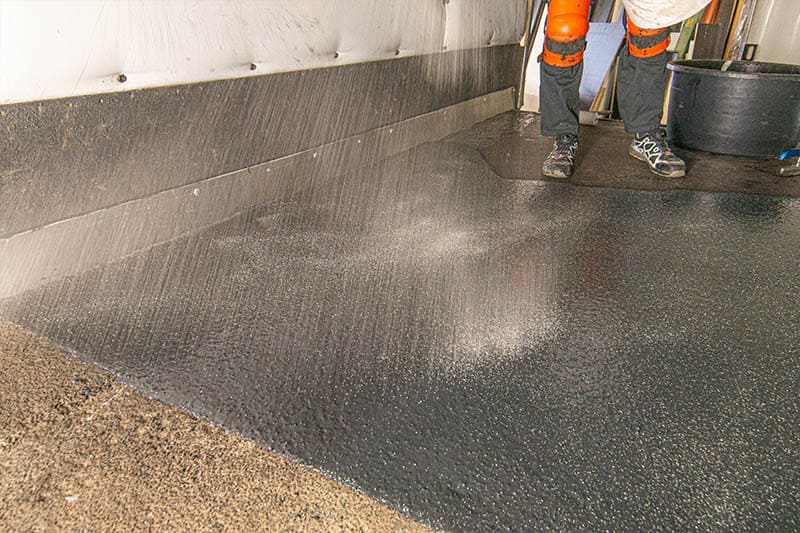
Step 4: Applying the HORSE PROTECT Liquid Rubber
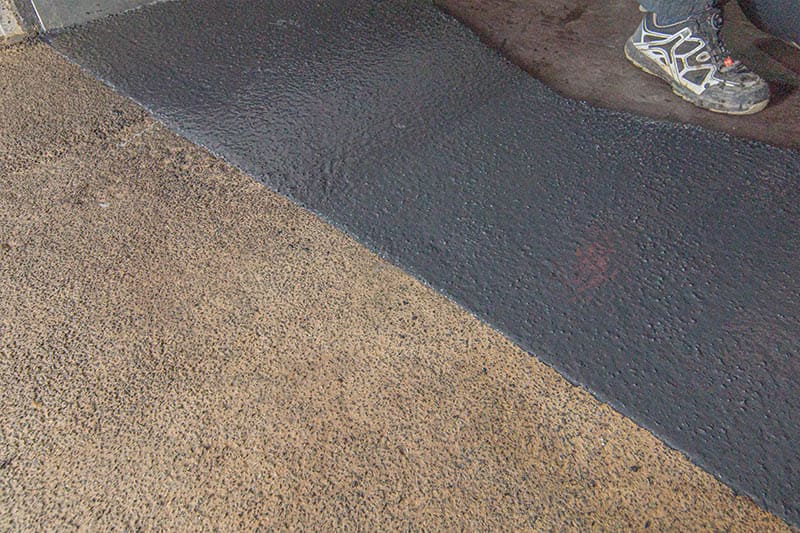
Application of the three-component liquid rubber begins in the front section of the trailer or lorry. This necessitates working precisely. To ensure a seamless bond, the liquid rubber is first applied and spread with a trowel and then gently rolled with a spiked roller to remove any areas of unevenness and close the pores. This guarantees a permanently jointless and extremely resilient surface. If you know how, you can create a very durable floor covering that will delight horse owners and animals for years to come.
Fact: in contrast to many rubber mat systems, HORSE PROTECT Liquid Rubber can be repaired. If an area has been destroyed due to scraping or mechanical damage to the surface after a number of years, it can easily be repaired to make it watertight again. Our portfolio includes our liquid rubber repair kits for this.